Replacing power bank batteries with laptop batteries involves several steps and requires some technical knowledge and tools. Here’s a general guide on how to do it:
In This Article
Note: This process may void the warranty of your power bank and could potentially damage the device if not done correctly. Proceed with caution and at your own risk.
Materials and Tools Needed
- Laptop batteries (make sure they have the same voltage as the original power bank batteries)
- Soldering iron and solder
- Heat shrink tubing or electrical tape
- Wire cutters/strippers
- Screwdriver
- Multimeter (optional but recommended)
Steps to Convert Laptop Battery to Power Bank
Step 1: Disassemble the Power Bank
- Use a screwdriver to remove the screws holding the power bank’s casing together.
- Carefully pry open the casing to access the internal components. Be gentle to avoid damaging any parts.
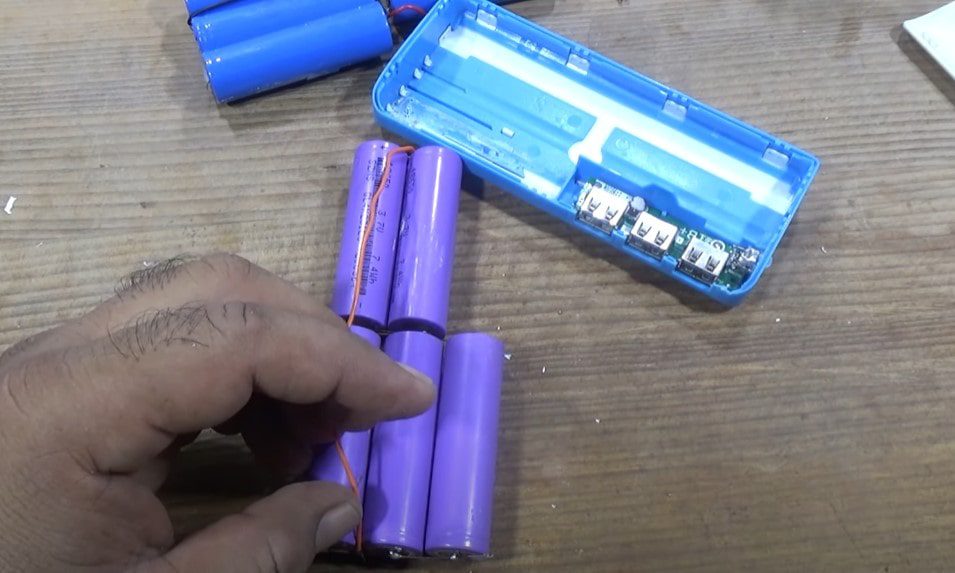
Step 2: Identify and Remove the Original Batteries
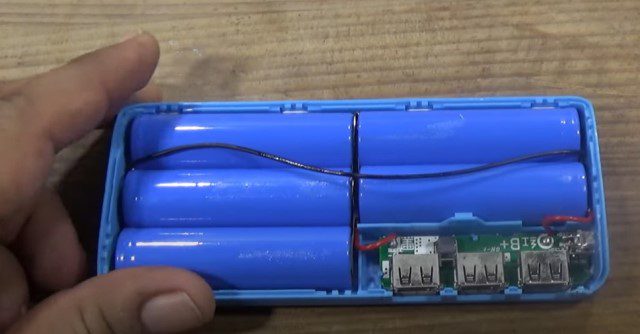
- Locate the original batteries inside the power bank. These are typically lithium-ion or lithium-polymer cells.
- Disconnect any wires or connectors attached to the batteries.
- Use a soldering iron to desolder the connections between the batteries and the power bank’s circuit board.
- Remove the original batteries from their housing.
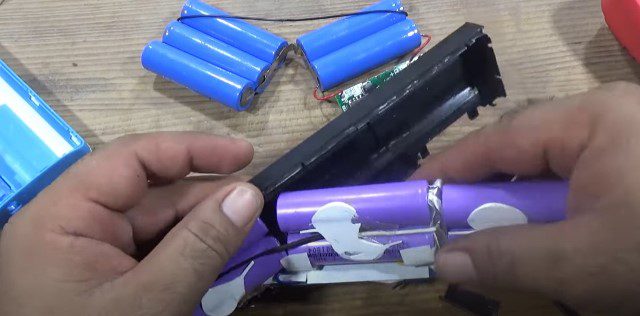
Step 3 Prepare the Laptop Batteries
- Ensure that the laptop batteries you’re using have the same voltage rating as the original batteries in the power bank.
- If necessary, solder wires or connectors to the terminals of the batteries for connection to the power bank’s circuit board.
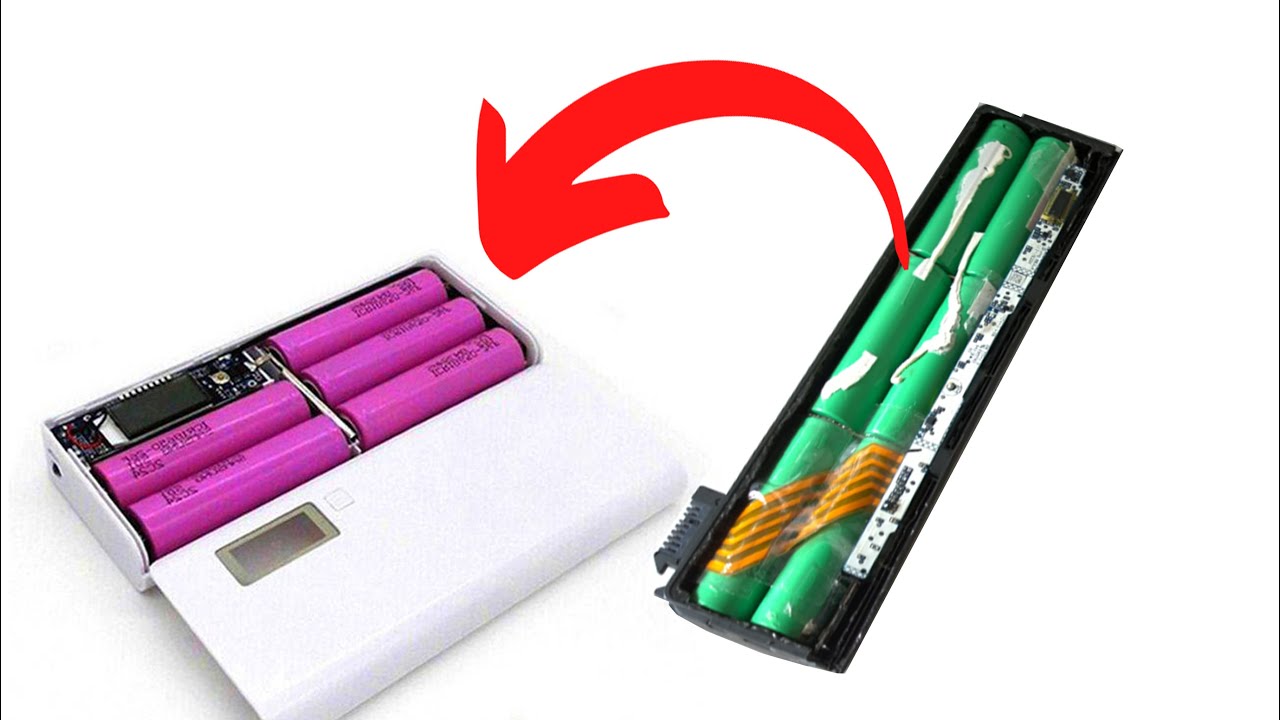
Step 4 Connect the Batteries to the Power Bank
- Position the batteries inside the power bank’s housing in the same configuration as the original batteries.
- Use a multimeter to ensure the polarity of the connections is correct.
- Solder the wires or connectors from the batteries to the appropriate points on the power bank’s circuit board.
Step 5 Insulate the Connections
- Once the connections are securely soldered, insulate them with heat shrink tubing or electrical tape to prevent short circuits.
Step 6 Test the Power Bank
- Before reassembling the power bank, test it to ensure that it charges and functions properly.
- Connect the power bank to a charging source and verify that it charges the connected devices without any issues.
Step 7 Reassemble the Power Bank
- Once you’ve confirmed that the power bank is working correctly, carefully reassemble its casing.
- Secure the casing with screws and ensure that everything is tightly closed and aligned.
Final Checks
- Perform a final check to ensure all connections are secure and insulated to prevent any electrical hazards.
- Test the power bank again to make sure it functions as expected.
By following these steps, you can replace the batteries in your power bank with laptop batteries. However, please keep in mind that this process requires technical skills and may not be suitable for everyone. If you’re not comfortable with soldering or working with electronic components, it’s best to seek assistance from a professional technician. Additionally, be aware of the risks involved, including the potential for damage to the power bank or injury from mishandling electronic components.